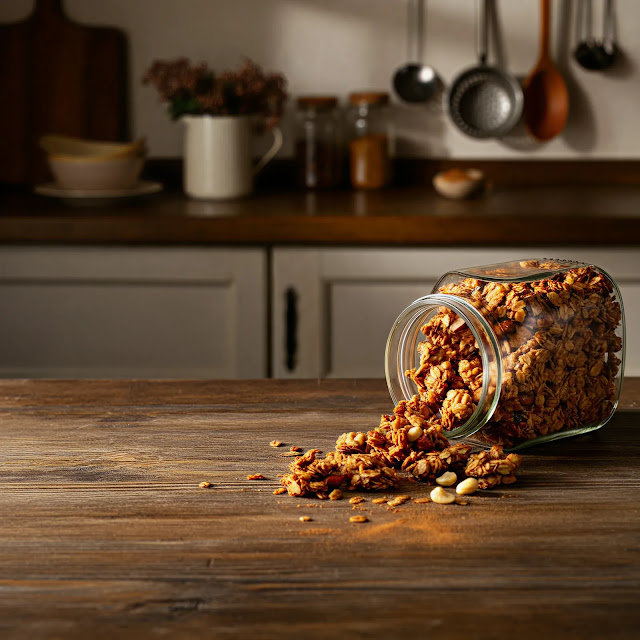
Granola clusters are the ultimate snack crossover – part breakfast staple, part grab-and-go treat. Whether you’re racing out the door in the morning or need a guilt-free treat during the day, granola clusters tick all the boxes. But nothing beats the taste, aroma, and satisfaction of making them yourself!
This guide will show you how to make perfectly crunchy granola clusters at home. You’ll learn how to achieve those big, satisfying chunks we all love, along with tips for customizing the flavor to suit your taste buds.
Why Make Your Own Granola Clusters?
Homemade granola clusters are better than store-bought for a few stellar reasons:
- Control the Ingredients: You know exactly what goes into them. Skip the preservatives and control the sugar content.
- Customize to Your Taste: Love cranberries? More nuts? Prefer maple syrup to honey? Your granola, your rules.
- Cost-Effective: Making granola clusters at home is usually cheaper, especially if you buy ingredients in bulk.
- Healthier Option: Many store-bought granola options are packed with hidden sugars and oils. Homemade eliminates guesswork.
Now, roll up your sleeves and get ready to fill your kitchen with the warm, nutty aroma of baking granola clusters.
What You’ll Need to Get Started
These basic ingredients form the foundation of your granola clusters. Now, here’s the beauty of granola — there’s plenty of room for customization, so consider this a starting point.
Basic Ingredients
- 2 cups of rolled oats (not instant or steel-cut)
- 1/2 cup of nuts or seeds (like almonds, pecans, or sunflower seeds)
- 1/3 cup of sweetener (honey, maple syrup, or agave syrup work great)
- 1/4 cup of oil (coconut oil or vegetable oil)
- 1/2 tsp of vanilla extract
- 1/2 tsp of cinnamon
- 1/4 tsp of salt
Optional add-ins (mix these in after baking): chocolate chips, dried fruits (like cranberries or raisins), shredded coconut, or spices like nutmeg or cardamom.
Equipment Needed
- Large mixing bowl
- Baking sheet
- Parchment paper or a silicone baking mat
- Spatula
Step-by-Step Recipe for Crunchy Granola Clusters
Step 1: Preheat Your Oven
Start by preheating your oven to 300°F (150°C). This lower baking temperature helps your granola bake evenly and prevents burning.
Step 2: Combine Dry Ingredients
Mix the rolled oats, nuts or seeds, cinnamon, and salt in a large mixing bowl. Stir well so everything is evenly distributed.
Step 3: Prepare the Wet Mixture
In a small saucepan, gently heat the oil, sweetener, and vanilla extract until combined and slightly warmed. This makes it easier to coat the dry ingredients. Do not boil.
Step 4: Mix It All Together
Pour the wet mixture over the dry ingredients. Using a spatula, mix until all the oats and nuts are well-coated. This step is crucial for getting those delightful, sticky clusters.
Step 5: Pack It Down
Spread the mixture onto a parchment-lined baking sheet in a single layer. Here’s the trick for cluster magic: press the granola down firmly with the back of your spatula so it forms one solid layer. This prevents it from breaking apart during baking.
Step 6: Bake to Perfection
Place the baking sheet in the oven and bake for 20-25 minutes. After 15 minutes, gently rotate the pan to ensure even browning. Resist the temptation to stir as this will break the clusters.
Step 7: Cool Completely
Once the granola is golden brown and smells amazing, remove it from the oven. Let it cool completely on the baking sheet without touching it. This is when the clusters will harden.
Step 8: Break into Clusters
Once cooled, use your hands to gently break the solid layer into bite-sized clusters.
Optional final step? Toss your freshly-made clusters with your favorite dried fruit, chocolate chips, or shredded coconut for an extra layer of flavor.
Tips for Perfect Granola Clusters Every Time
- Don’t Skip the Oil and Sweetener: These ingredients act as the glue holding the clusters together.
- Use a Low Oven Temperature: Slow and steady wins the granola game. High temperatures can lead to burning or uneven cooking.
- Press It Down Firmly: The tighter you pack the granola on your baking sheet, the chunkier the clusters.
- Experiment with Flavors: Add cocoa powder for chocolate granola, swap honey for maple syrup for a richer flavor, or sprinkle in some sea salt for a sweet-savory combo.
How to Store Your Granola Clusters
Once your granola clusters are ready, store them in an airtight container at room temperature. They’ll stay fresh for up to two weeks (if you can resist munching on them for that long!). For longer storage, you can freeze them in ziplock bags for up to three months.
Delicious Ways to Enjoy Granola Clusters
Granola clusters aren’t just for snacking. Here’s how you can use them in your daily meals:
- Breakfast Bowls: Sprinkle over yogurt, smoothie bowls, or oatmeal for crunch and flavor.
- On-the-Go Snack: Fill up a small container to take with you for those midday cravings.
- Desserts: Use as a crunchy topping for ice cream or pudding.
- Cereal Alternative: Add milk (or a dairy-free alternative) and eat them like cereal.
- Trail Mix: Combine with dried fruits and extra nuts for a DIY trail mix.
Elevate Every Snack with Homemade Granola Clusters
Making your own granola clusters at home is rewarding, easy, and endlessly customizable. Say goodbye to overly sweet store-bought versions and hello to a snack or breakfast that you can tweak to perfection for your taste and health goals.
Now that you’ve mastered the art of granola clusters, why stop here? Experiment with flavors, swap in seasonal ingredients, and elevate your morning routine one crunchy bite at a time!
Feeling inspired? We’d love to see your delicious homemade granola clusters! Share your creations on social media and tag us with #GranolaGoals. Happy cooking!


Post a Comment